At a time when e-commerce and online transactions are continuously expanding, having a effective payment system on their own website becomes crucial. Among the various options available, the PayPal button stands out as a solution Reliable and easy to implement, particularly suitable for users of WordPress.
This guide is dedicated to showing you how you can easily integrate the PayPal button into your WordPress site, making it a tool ready to handle payments securely and professionally. With a few clear and simple steps, you will transform your site into a platform comprehensive and functional for e-commerce, without the need for advanced technical skills.
The PayPal button is not just a security guarantee for you and your clients, but it also represents a versatile solution which is suitable for different types of websites, from blogs to online stores. By following the directions in this guide, you will be able to implement quickly this tool, optimizing the shopping experience on your site and facilitating the management of online transactions.
The Simplicity of the PayPal Button on WordPress
The integration of the PayPal button in your WordPress site is surprisingly simple, eliminating the need to be an expert in programming or to install complex plugins. With a few intuitive steps, any site-be it a blog, an online store, or an information portal-can be equipped to manage transactions efficiently. The most advantageous feature? PayPal handles the entire payment process, transferring the funds directly to your account.
If you need assistance or would like further clarification, our team of WordPress Support Is always available. Please feel free to write to us at. supporto@gtechgroup.it for any questions or support related to the implementation of the PayPal button or other technical issues. We are here to help make your online experience smoother and more professional.
How to Add PayPal Button
Step 1: Set up a PayPal Business Account
To add the PayPal button to your WordPress site, it is essential to have a PayPal Business account. It is easy and free to switch from a Personal to a Business account. To create or update your account, visit the PayPal Business official website.
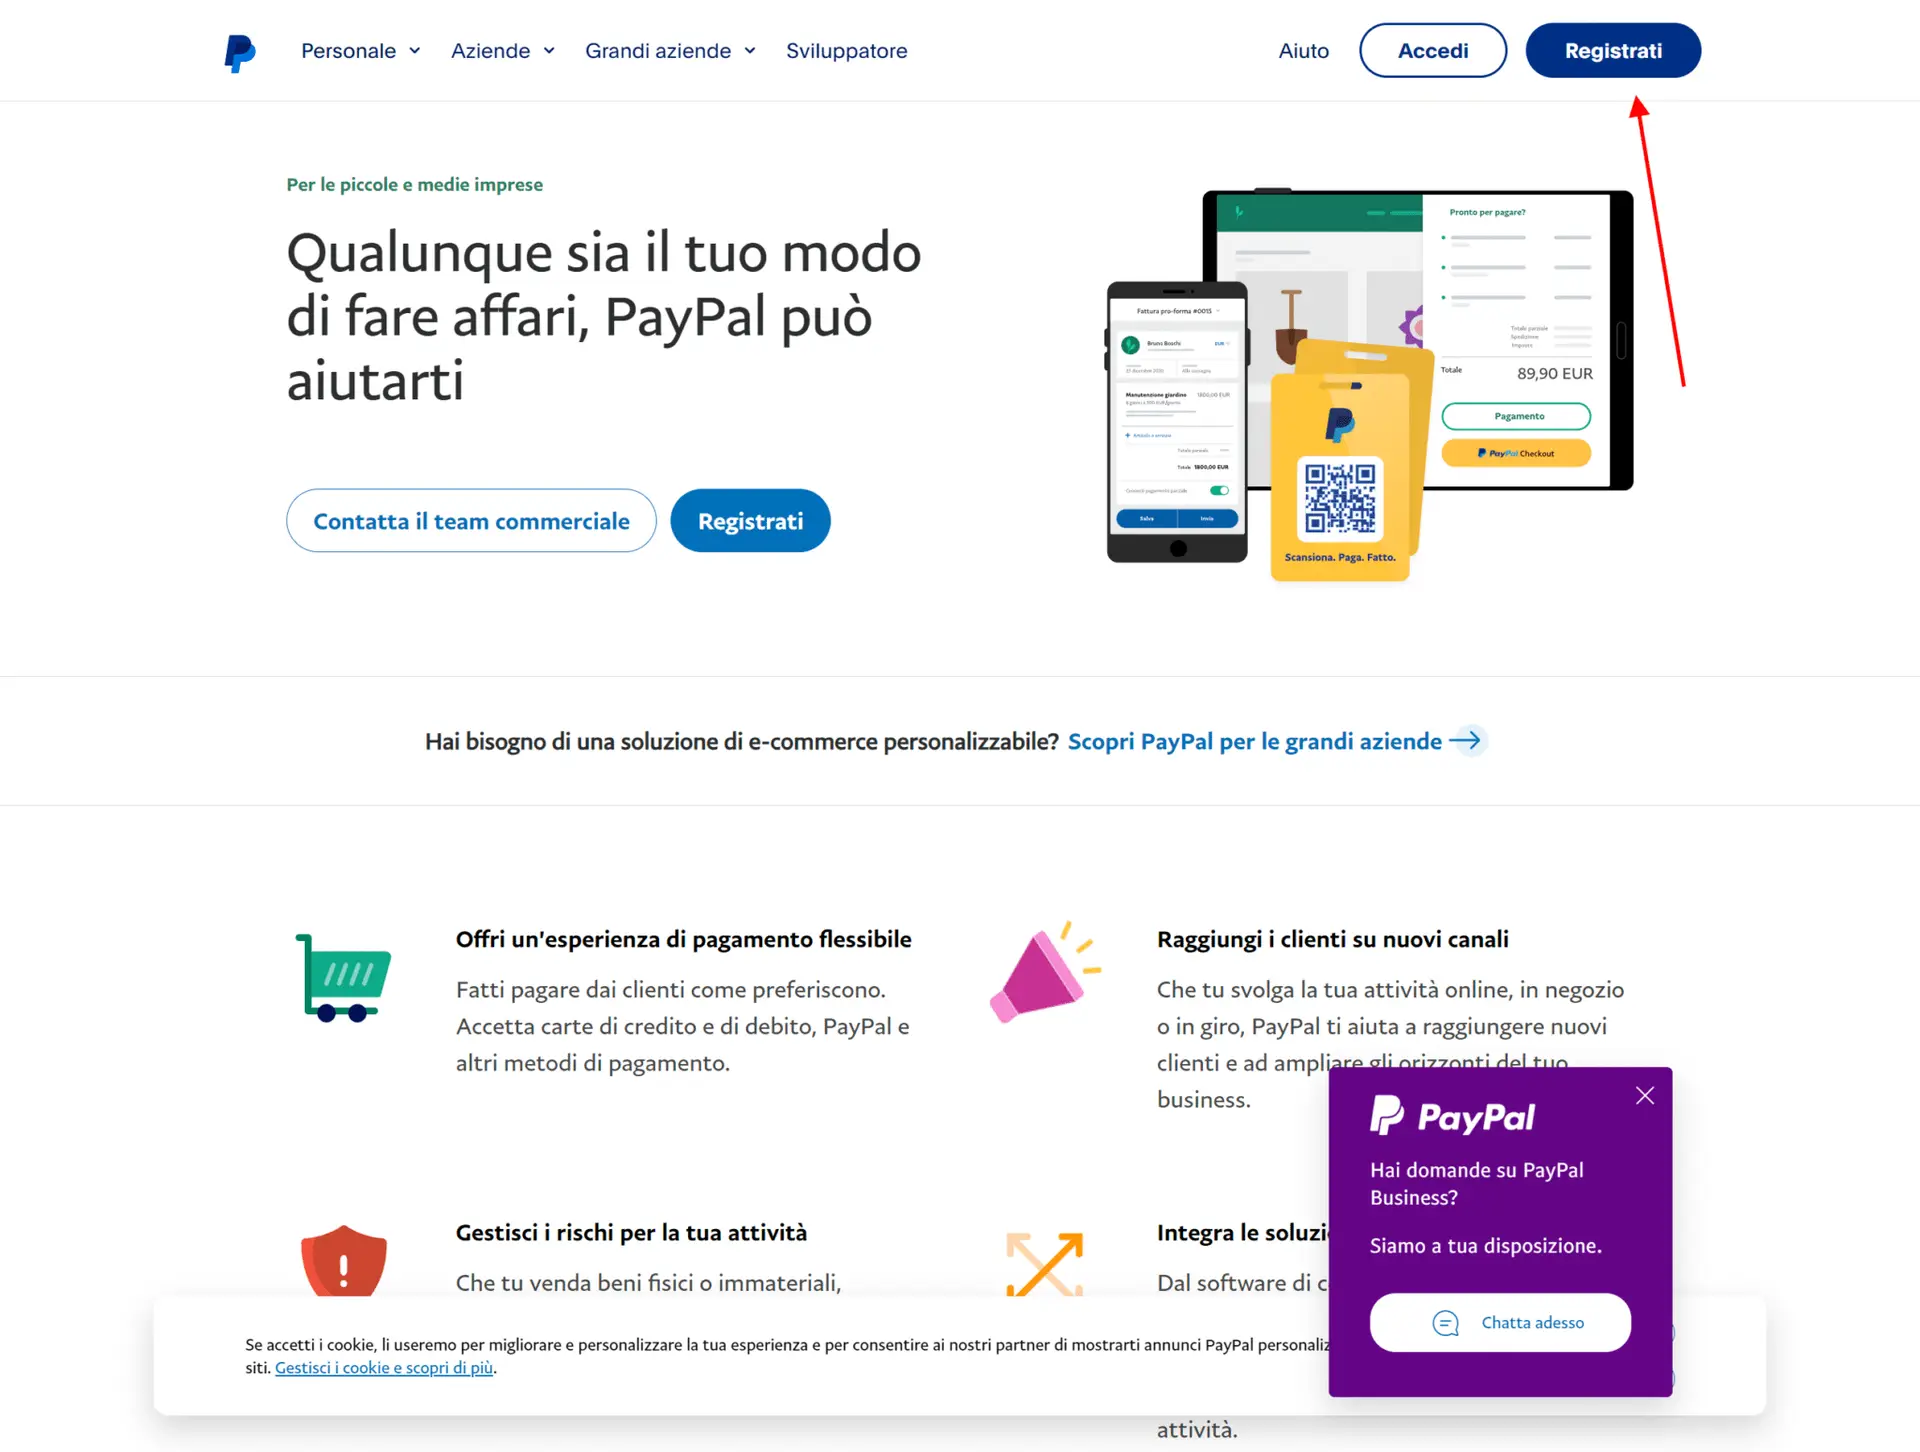
how to register on paypal business
Step 2: Create Your PayPal Button
Once you access your PayPal Business account, you can proceed to set up a button to receive donations on your site. Here's how to do it:
- Navigate the Dashboard: After logging in, search for and select the section "Make and receive payments." in your PayPal account. This step will direct you to the page devoted to managing different payment methods.
- Select 'Accept Payment': Within this area, you will find several options for managing payments. Here you will need to focus on the specific option for donations.
- Choose the 'Donations' Option: From the various choices available, select "Donations". This is the starting point for creating a dedicated donation button on your site.
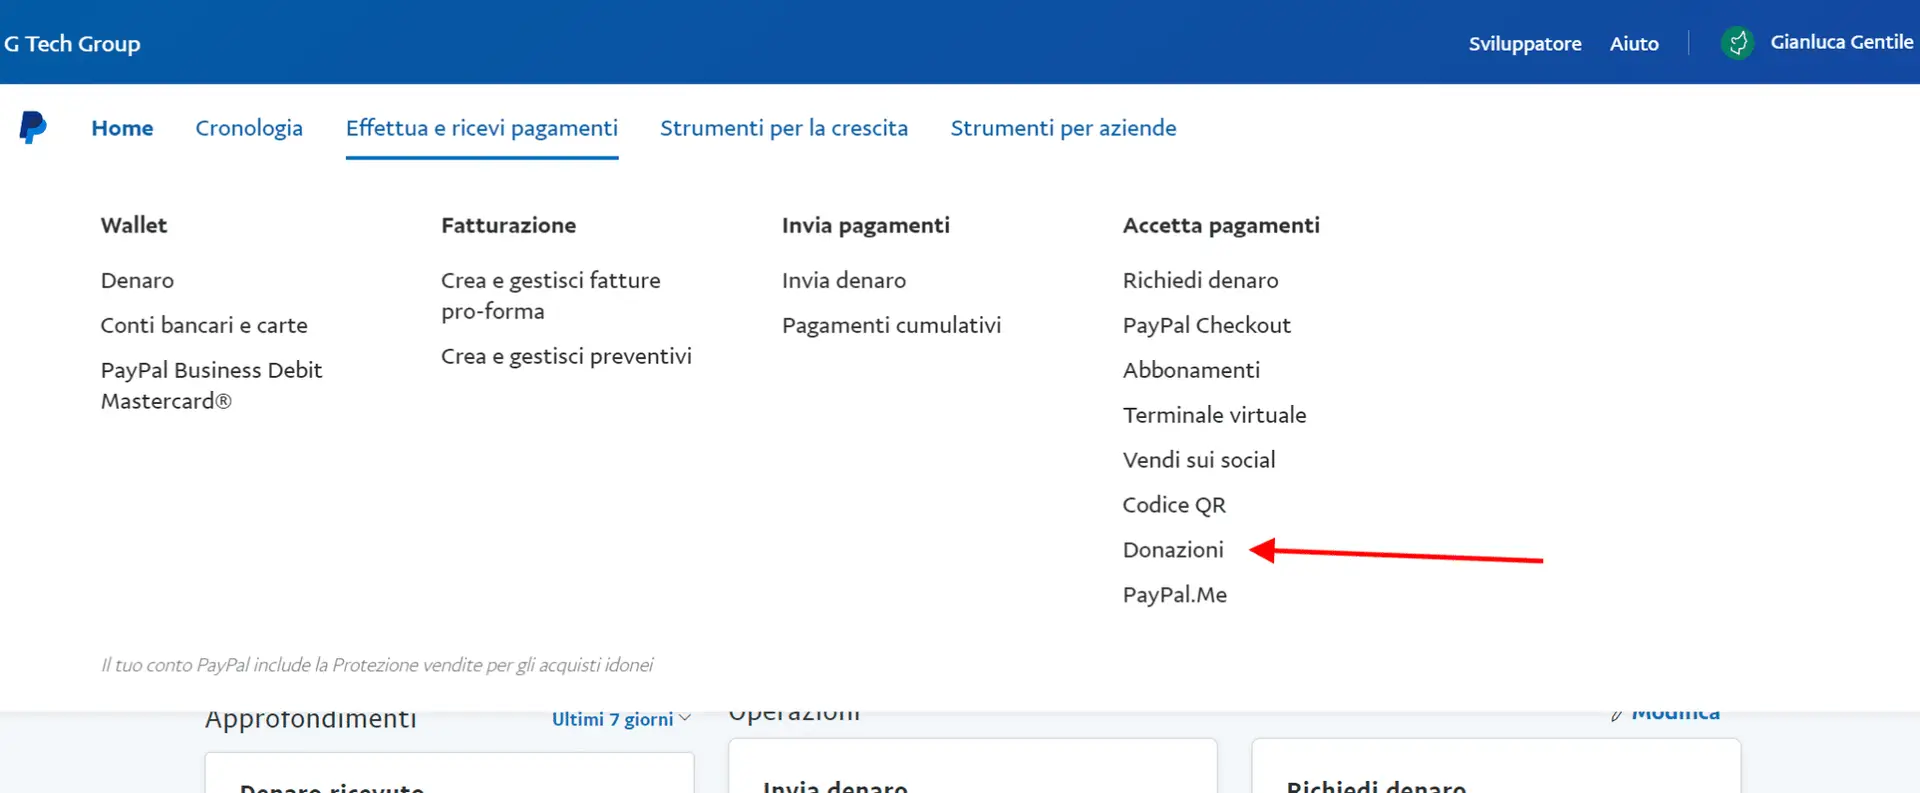
click on donations
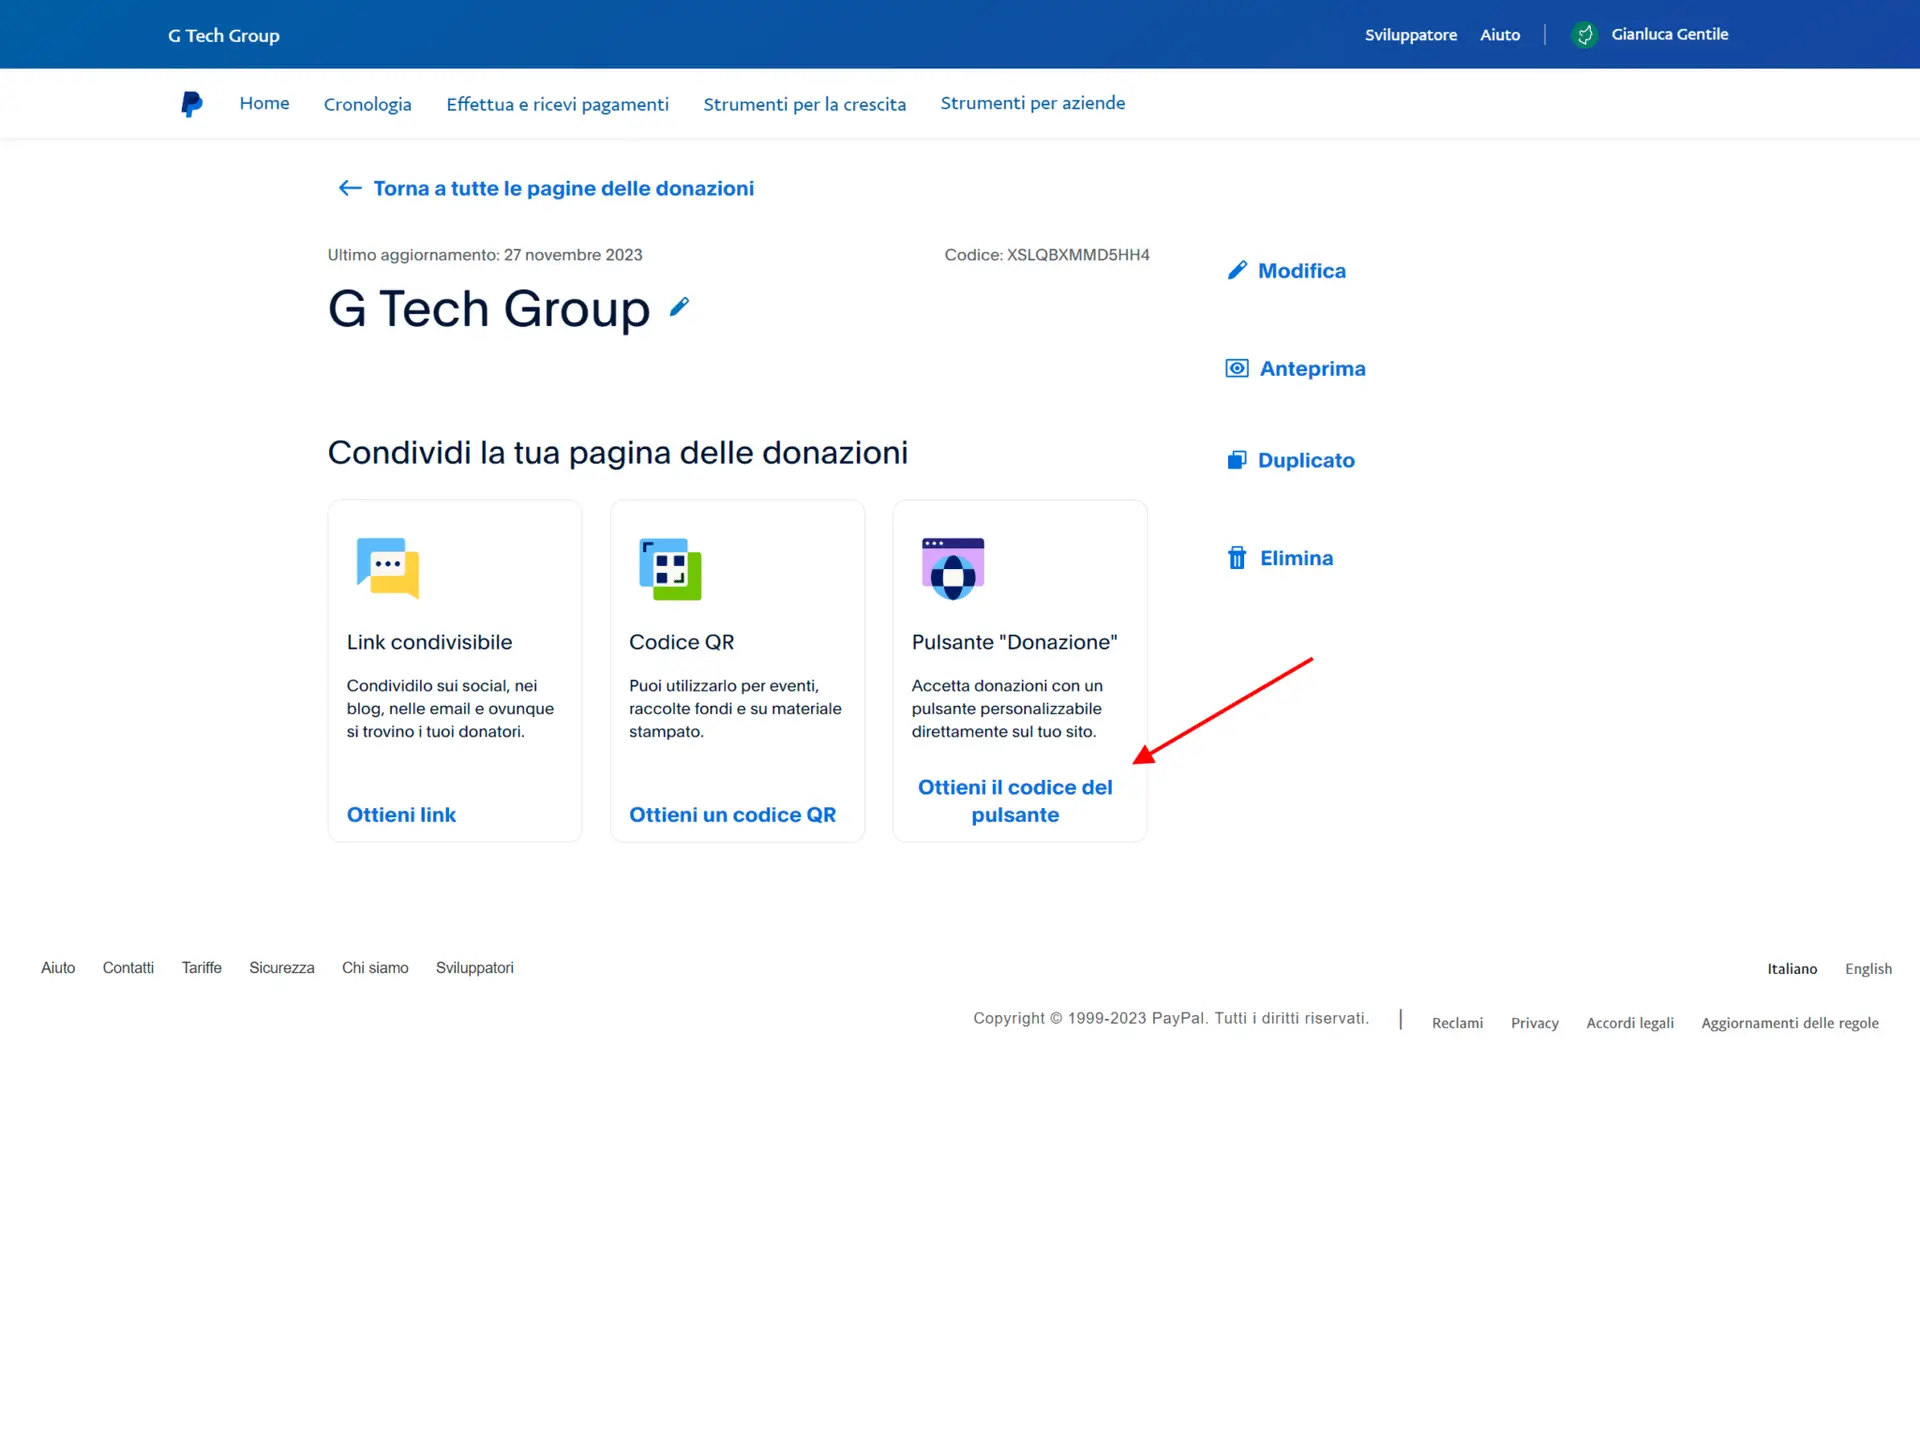
- Customize Your Button: After choosing the option for donations, you will have the opportunity to customize your button. Here you can tailor the appearance and functionality of the button to suit your specific needs and those of your donors.
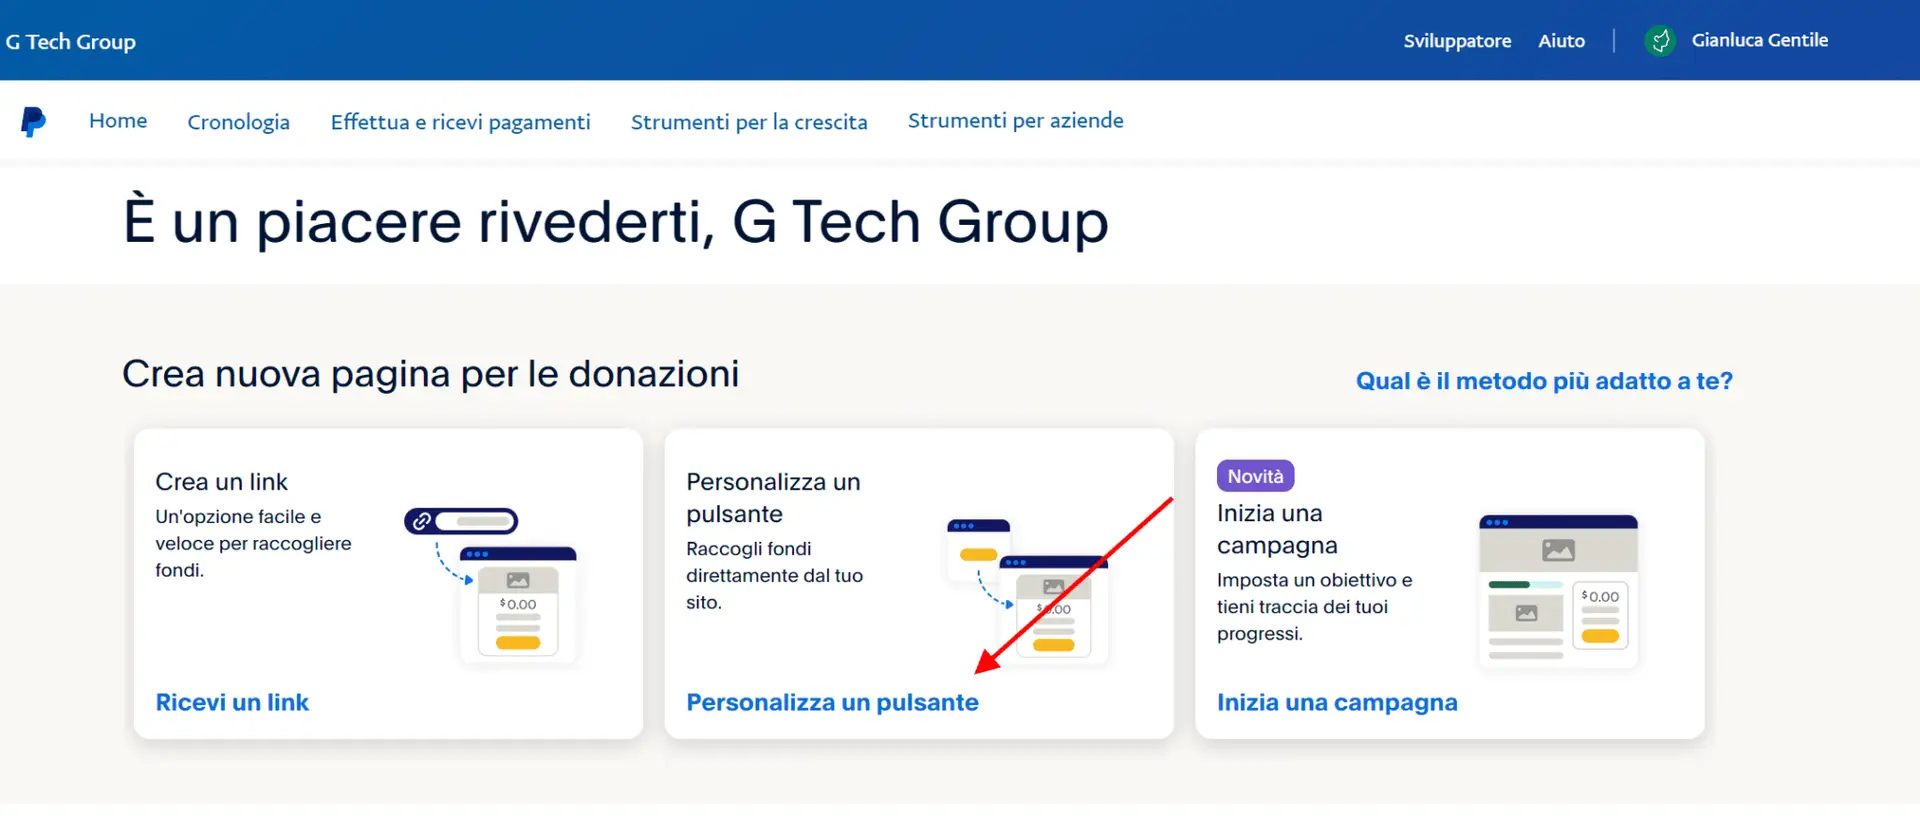
click on customize button
This process allows you to create a button tailored to your site, whether you are running a fundraising campaign or offering an easy way to accept voluntary contributions. Customizing the donation button will make the donation process more seamless and in line with your site's identity, offering donors a simple and secure way to support your cause or activity.
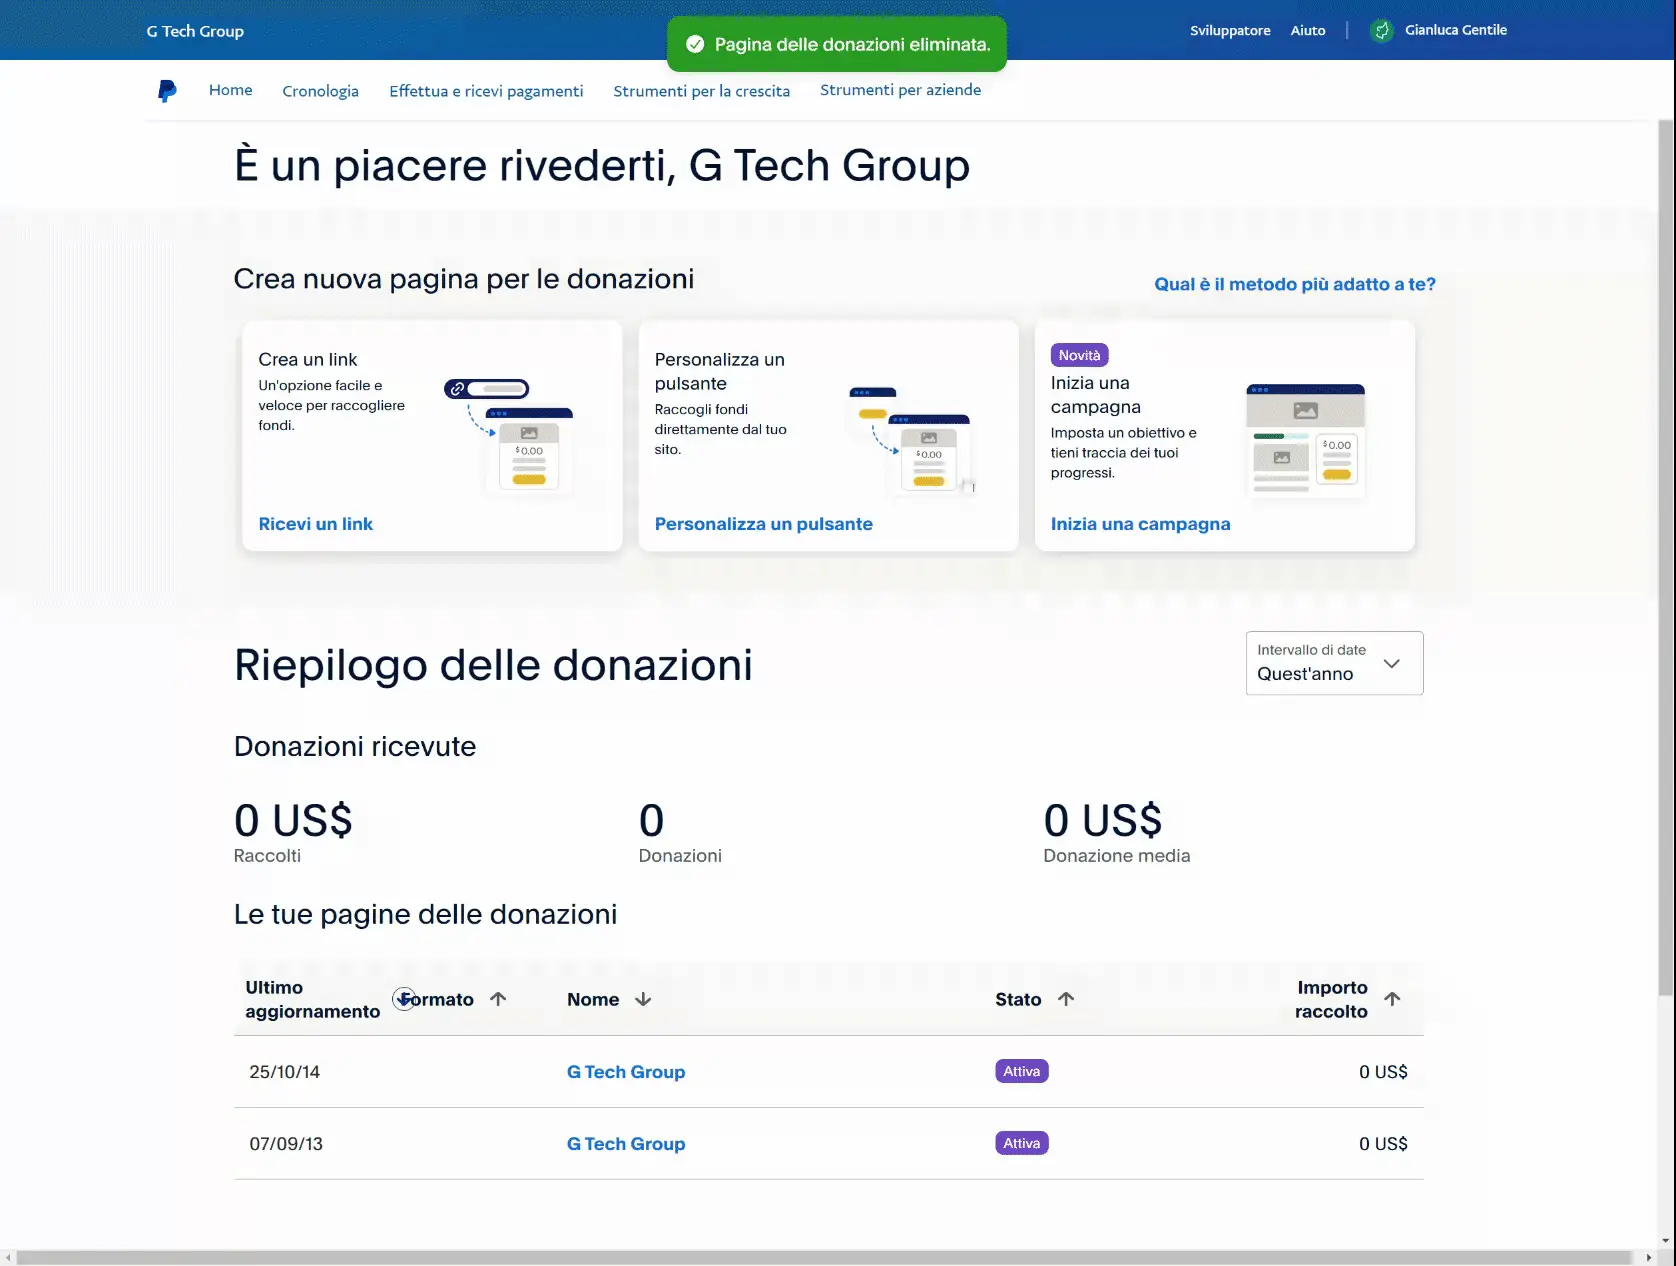
how to create donate button with paypal
Step 3: Place the Code on Your WordPress Site
Once you have set up your PayPal button and selected your desired payment options, PayPal will automatically generate a HTML code specific to the button. This code is essential because it acts as a "bridge" between your WordPress site and PayPal's payment system.
How to get the code to enter on the website
Here's what to do next:
- Copy Code: PayPal will show you the generated HTML code. You will need to copy it in its entirety, making sure not to change any part to maintain proper functionality.
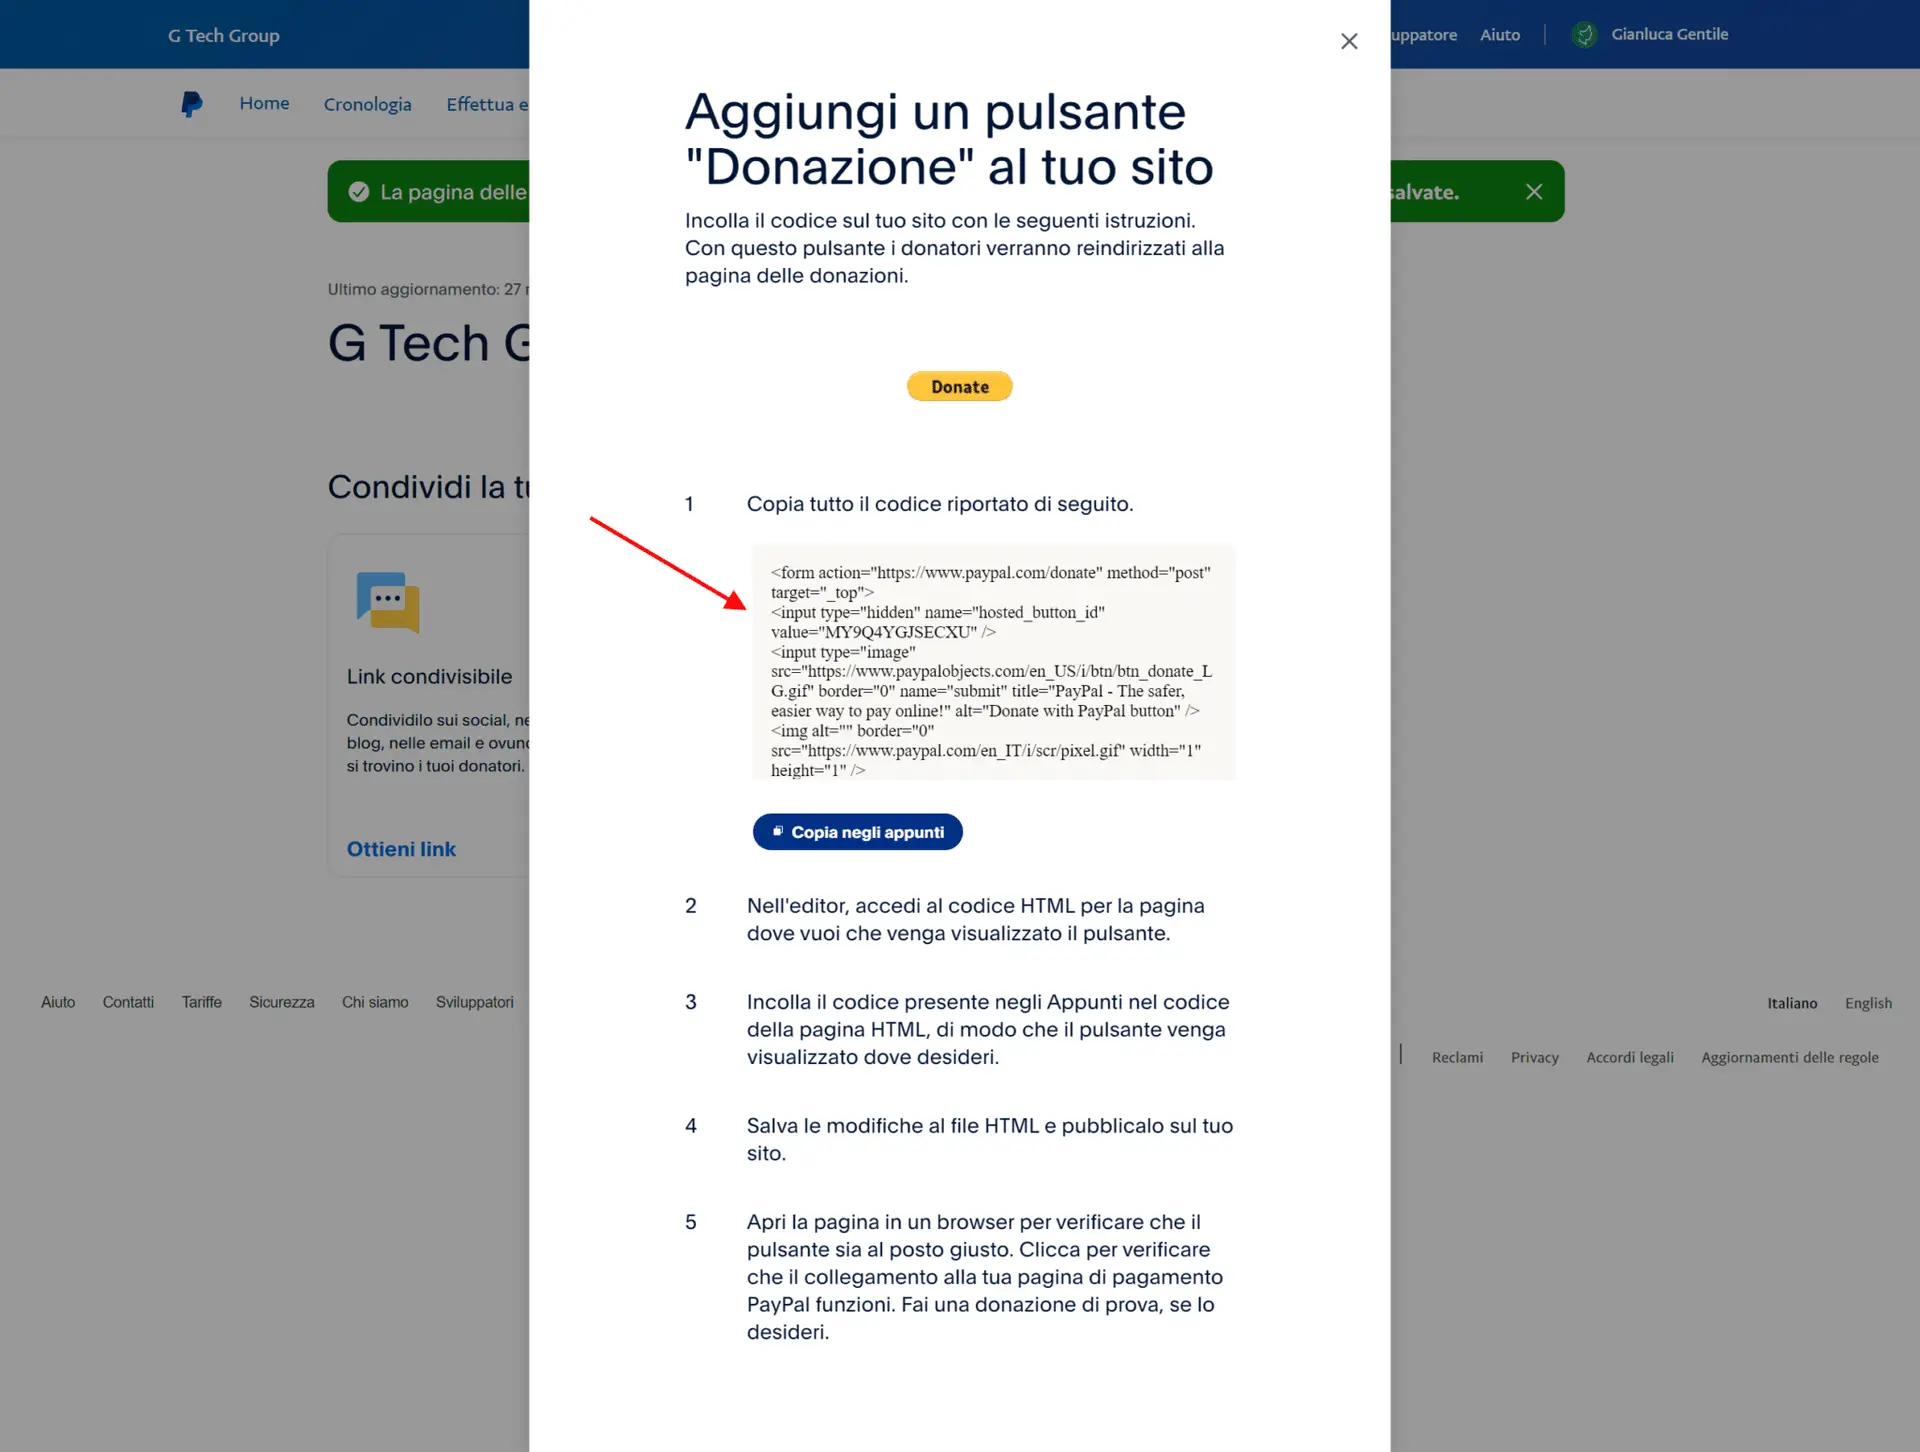
example of donations button code
- To insert the PayPal button into your WordPress site, you will need to paste the HTML code provided by PayPal. The process varies slightly depending on the editor you use to manage your site's content. Here's how to proceed:
If You Use the Classic Text Editor.
- Access the Administration Panel: Enter the WordPress dashboard and navigate to the page or post where you want to insert the button.
- Paste HTML Code: Place your cursor in the exact spot where you want the PayPal button to appear and paste the HTML code directly. Once you save your changes, the button will be visible on your page.
If You Use the Gutenberg Editor
- Open the Gutenberg Editor: On the desired page or post, open the Gutenberg editor.
- Add a Custom HTML Block: Click on the button to add a new block and select "Custom HTML" from the list of available options.
- Paste Code: Paste the HTML code of the PayPal button inside the custom HTML block. After saving or publishing the page, the button will be operational.
Use with Elementor
If your site uses Elementor, a popular page builder for WordPress, the process is equally simple:
- Open Page with Elementor: Navigate to the page where you want to add the button and open the Elementor editor.
- Add an HTML Widget: Among the various widgets available in Elementor, you will find the "HTML" option. Drag it to the desired section of your page.
- Paste Code: In the HTML widget, paste the code for the PayPal button. Elementor allows you to preview in real time how the button will look on your site.
- Save Changes: Once you have entered the code, save or publish your page. The PayPal button will now be up and running.
These methods ensure that the PayPal button is inserted correctly into your WordPress site, regardless of the editor or page builder you use.
In either case, the code should be inserted exactly where you want the PayPal button to appear on your site. Once you save your changes, the PayPal button will be visible and working on your WordPress page, allowing visitors to make payments or donations directly through your site.
Here is the code for my button, you should have something like this.
<form action=”https://www.paypal.com/donate” method=”post” target=”_top”>
<input type=”hidden” name=”hosted_button_id” value=”MY9Q4YGJSECXU” />
<input type=”image” src=”https://www.paypalobjects.com/en_US/i/btn/btn_donate_LG.gif” border=”0″ name=”submit” title=”PayPal – The safer, easier way to pay online!” alt=”Donate with PayPal button” />
<img alt="""" border="”0″" src="”https://www.paypal.com/en_IT/i/scr/pixel.gif”" width="”1″" height="”1″" />
</form>
PayPal.Me: A Simple Alternative
If you want an even more direct and immediate method of receiving payments, the PayPal.Me of PayPal is the ideal solution. Even with a simple standard PayPal account, you have the ability to generate a custom link To accept payments.
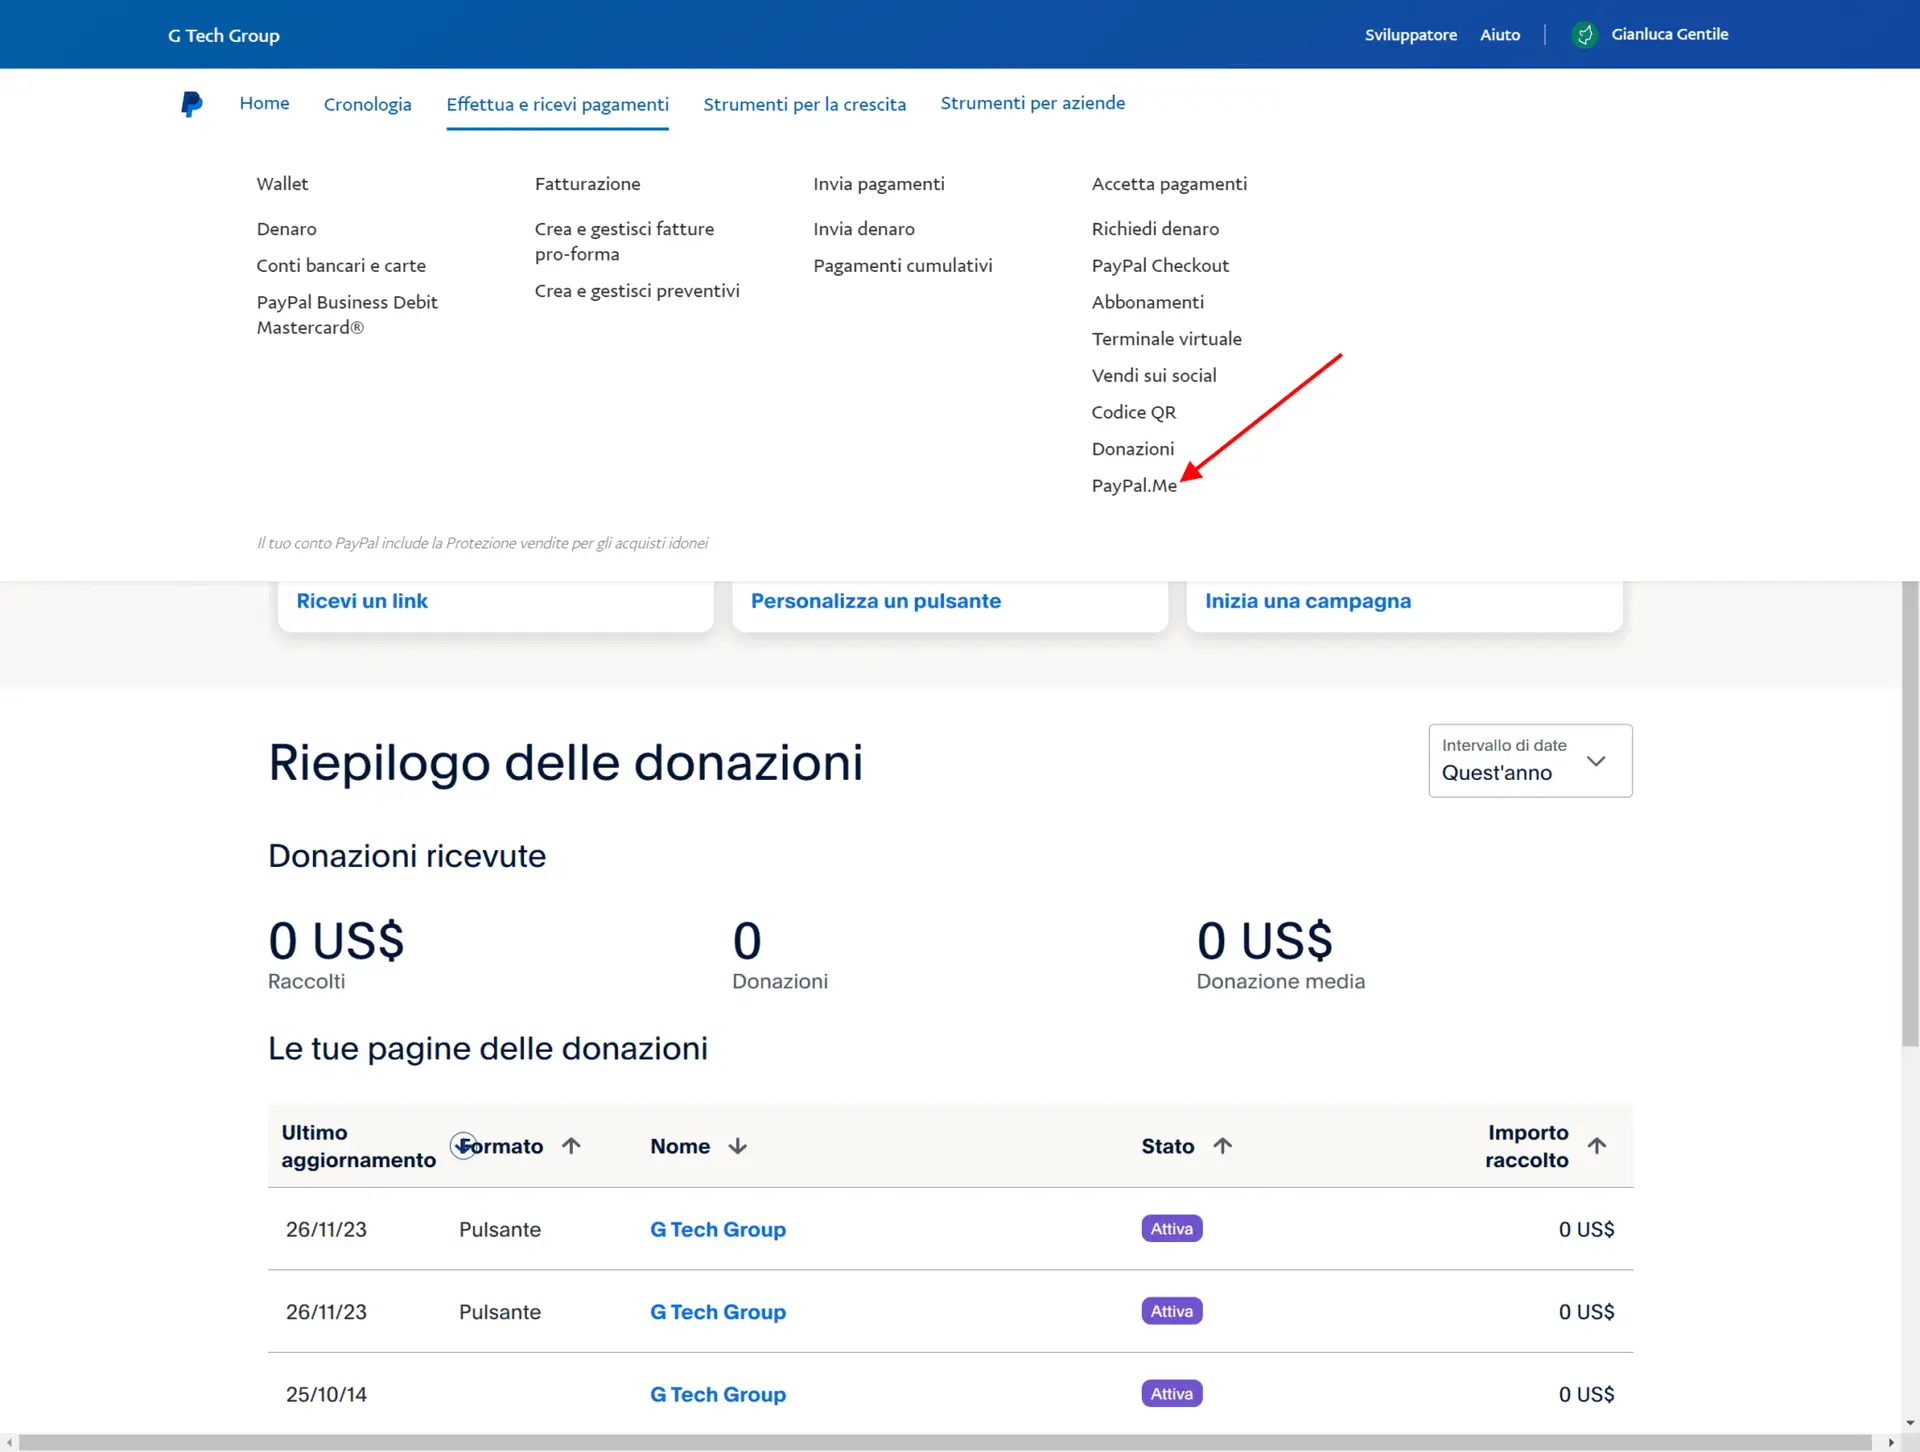
how to use paypal.me
Setting up your PayPal.Me profile is intuitive: you can upload a personal photo, establish the custom link (e.g., paypal.me/yourname), and add information that describe you or your business.
This link, once created, becomes an extremely easy way for anyone to send you money. For example, if your link is paypal.me/tuonome/30, anyone who uses it will be able to quickly send you 30 euros. It is an extremely practical and fast way to handle simple transactions without the need for complicated steps.
Conclusions and Useful Suggestions
Integrating the PayPal button into your WordPress site is a significant innovation for any online business. It is a surprisingly simple process that opens the door to a wide range of business opportunities. PayPal, with its wide range of features, is perfectly suited to a variety of needs: from the individual vendor who wants to accept payments for individual products, to nonprofit organizations looking to receive donations, to businesses that need to manage recurring subscriptions.
Using PayPal on your WordPress site is not limited to just adding a payment button. There is much more to it than that. For example, you can extend the functionality of e-commerce of your site by incorporating a shopping cart. For this, tools like the "WordPress Simple PayPal Shopping Cart" plugin can be incredibly useful. These plugins offer a simple and intuitive solution for adding a full shopping cart to your site, allowing your customers to select multiple products and proceed to checkout smoothly.
PayPal's versatility makes it possible to customize the shopping experience to the specific needs of your site and your customers. Whether you are selling physical products, offering services, or accepting donations, there is always a way to integrate PayPal in a way that works best for you.
Also, do not forget the option PayPal.Me. This solution is ideal for those looking for an even more direct and personal payment method. With PayPal.Me, you can easily create a payment link that your customers can use to send you money quickly and without complications.
If you have questions, curiosity, or would like to share your experience using the PayPal button or other PayPal tools on WordPress, feel free to leave a comment. Your feedback is valuable and can help other users navigate the world of online payments with more confidence and knowledge. Also check out other users' experiences and opinions about our services to get more tips and ideas.